Setup
***Google Authentication Setup***
Step 1 Google Login:- Go to below Link
Go to Google cloud platform developers Site
https://console.cloud.google.com/
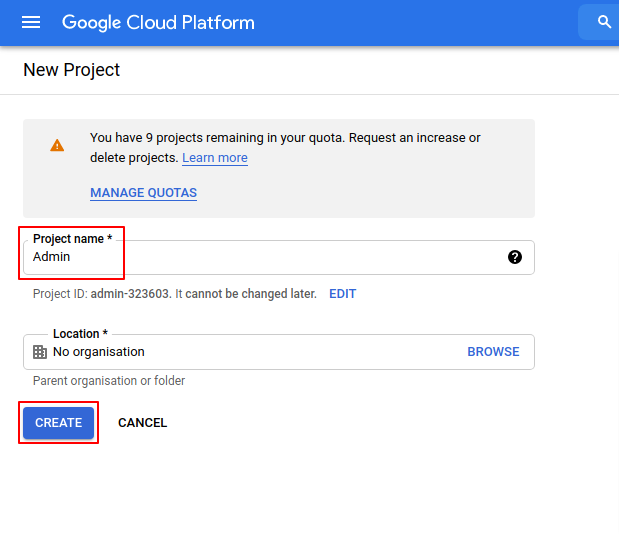
Step 2 :- Click on Create Project.

Step 3 :- Add Project name then click on CREATE.
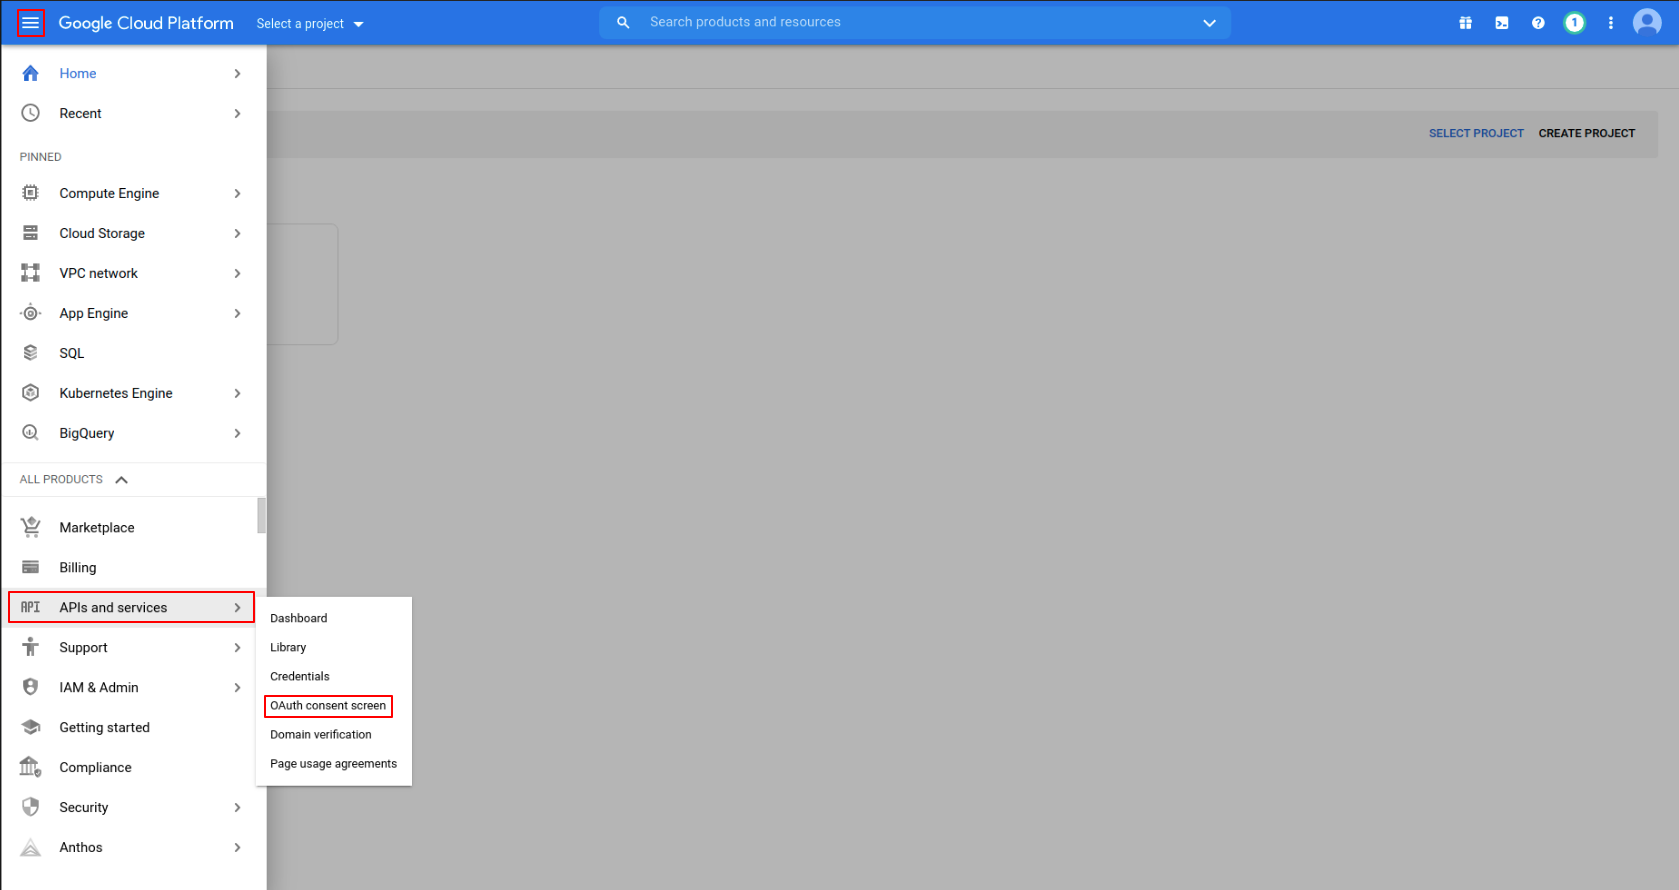
Step 4 :- Open Sidebar.Click on API and services then click on OAuth consent screen.
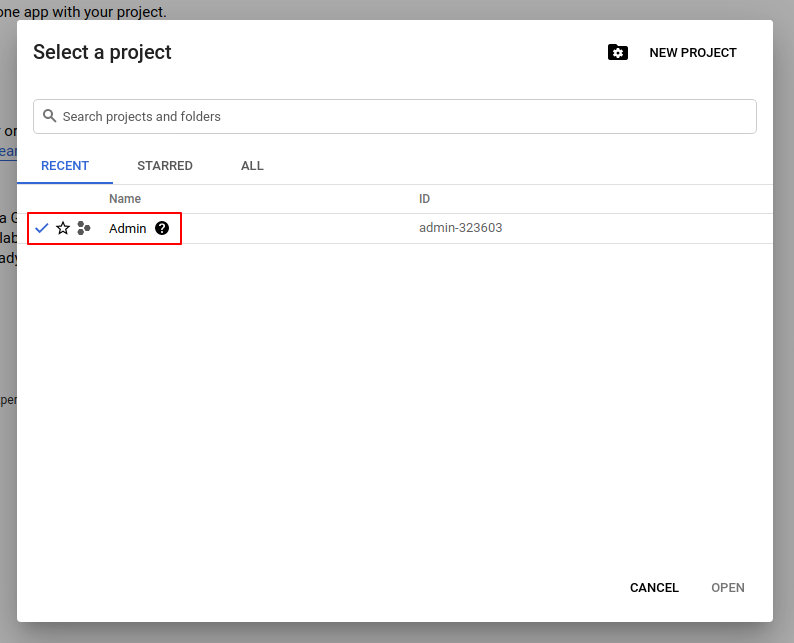
Step 5 :- Click on Select a Project.
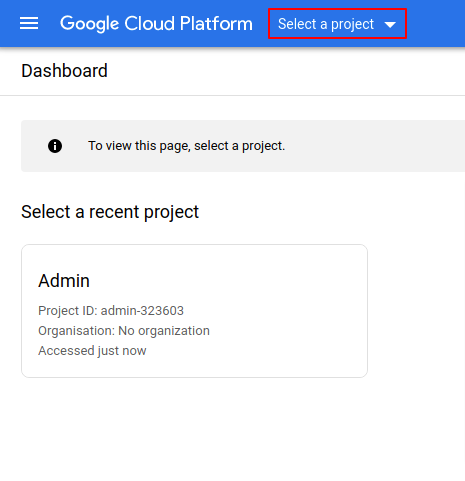
Step 6 :- Select your Project.
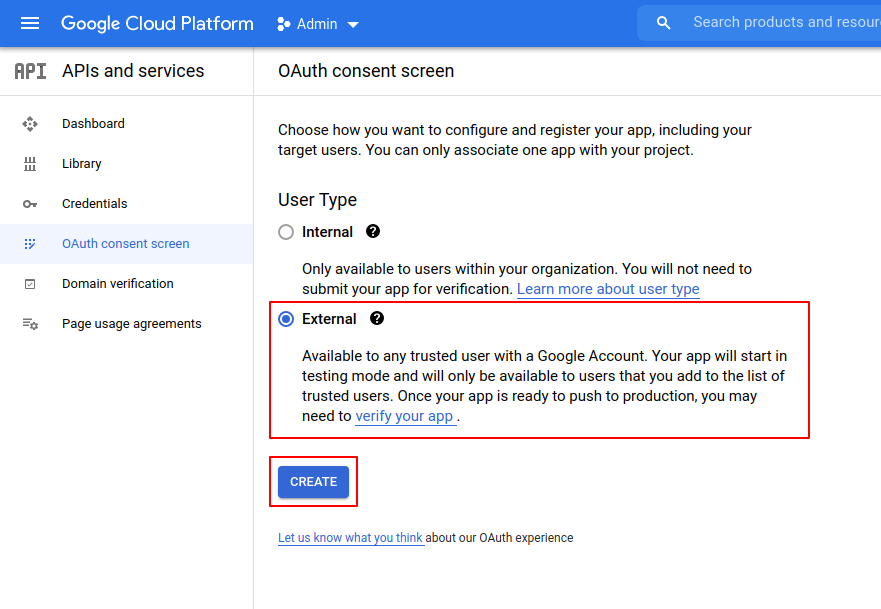
Step 7 :- Click on External as user type.
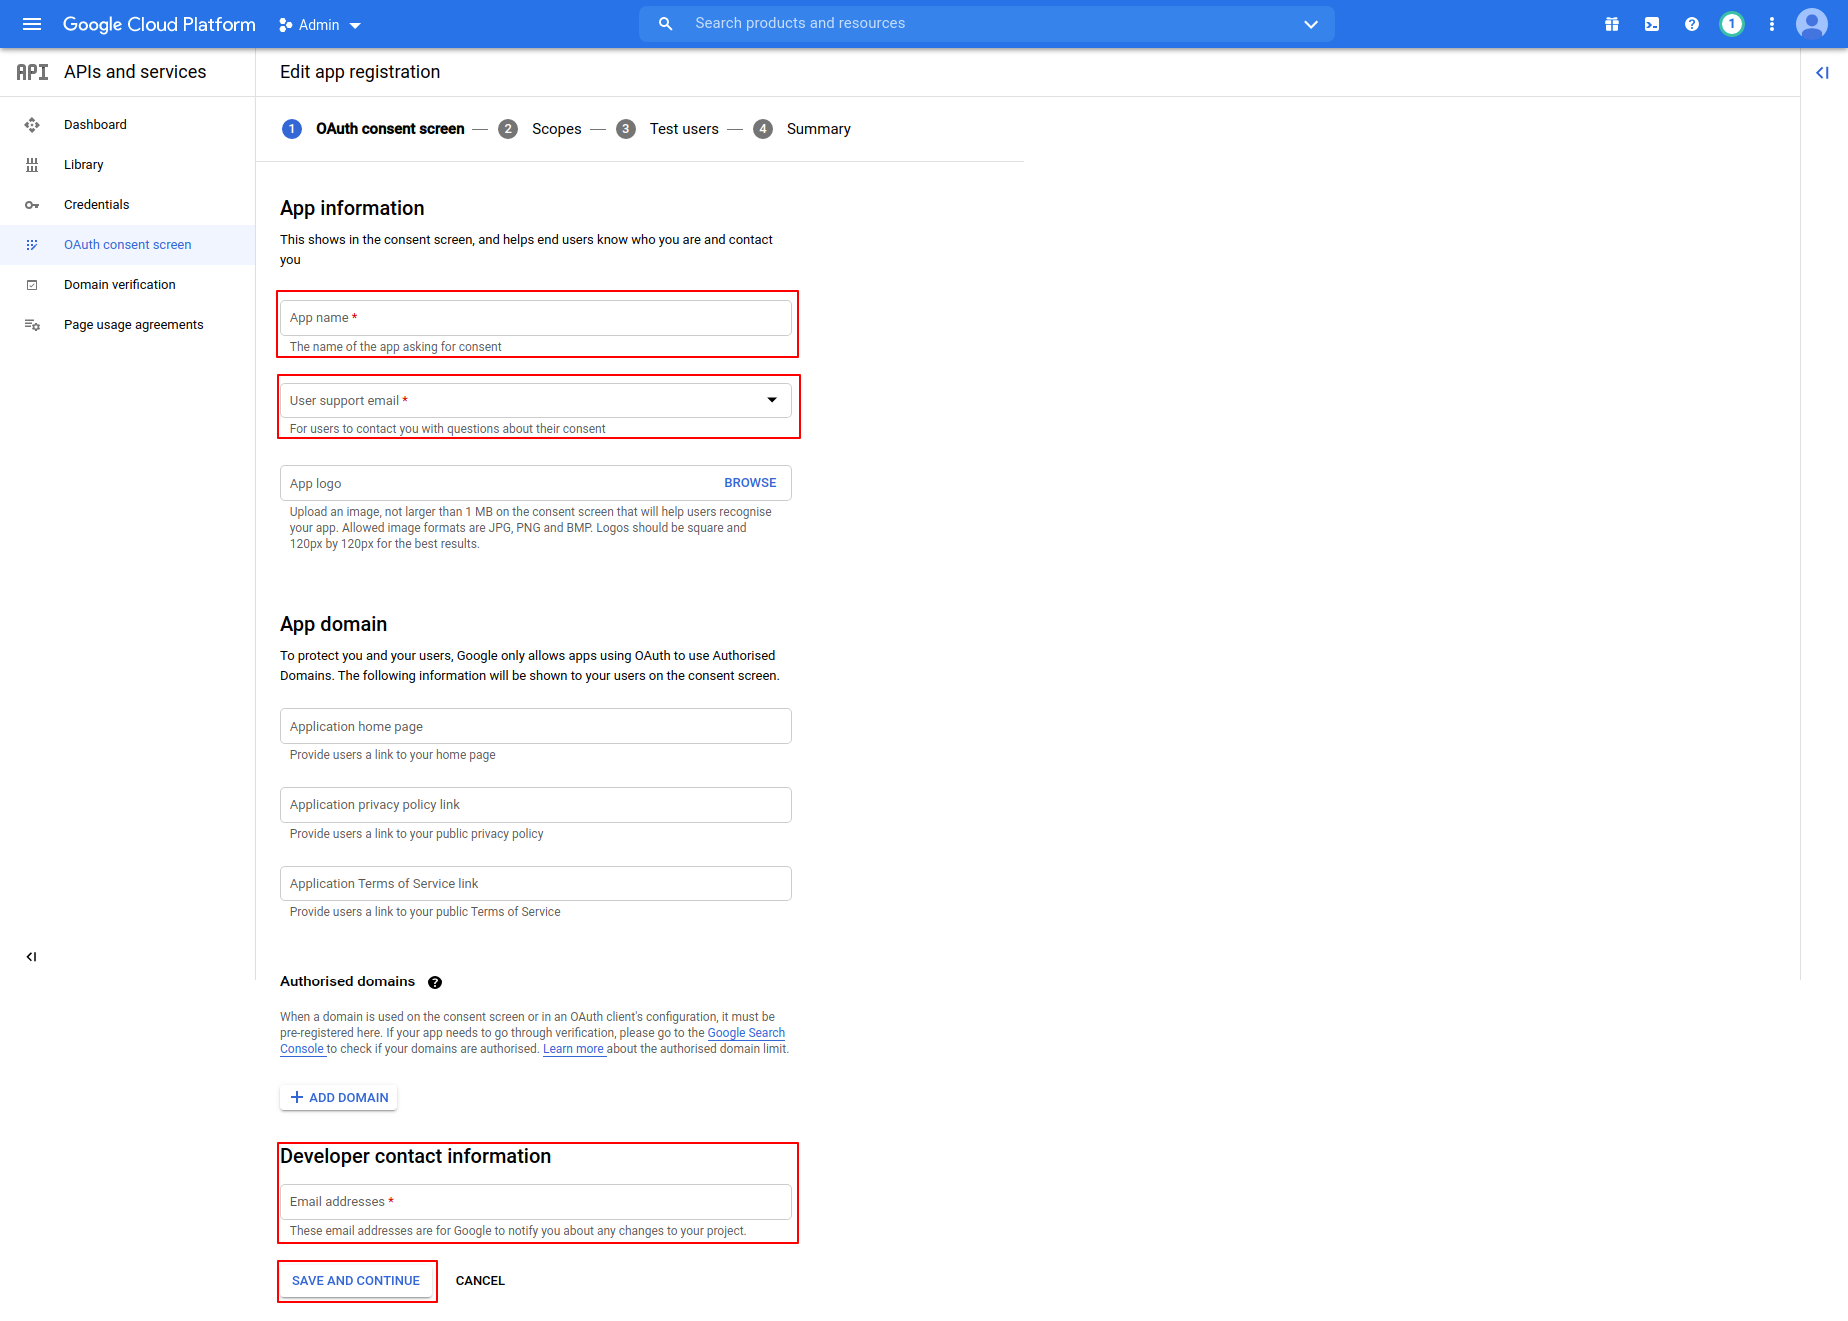
Step 8 :- Add App name,User support email,Develepors contact informantion email and then click on SAVE AND CONTINUE.
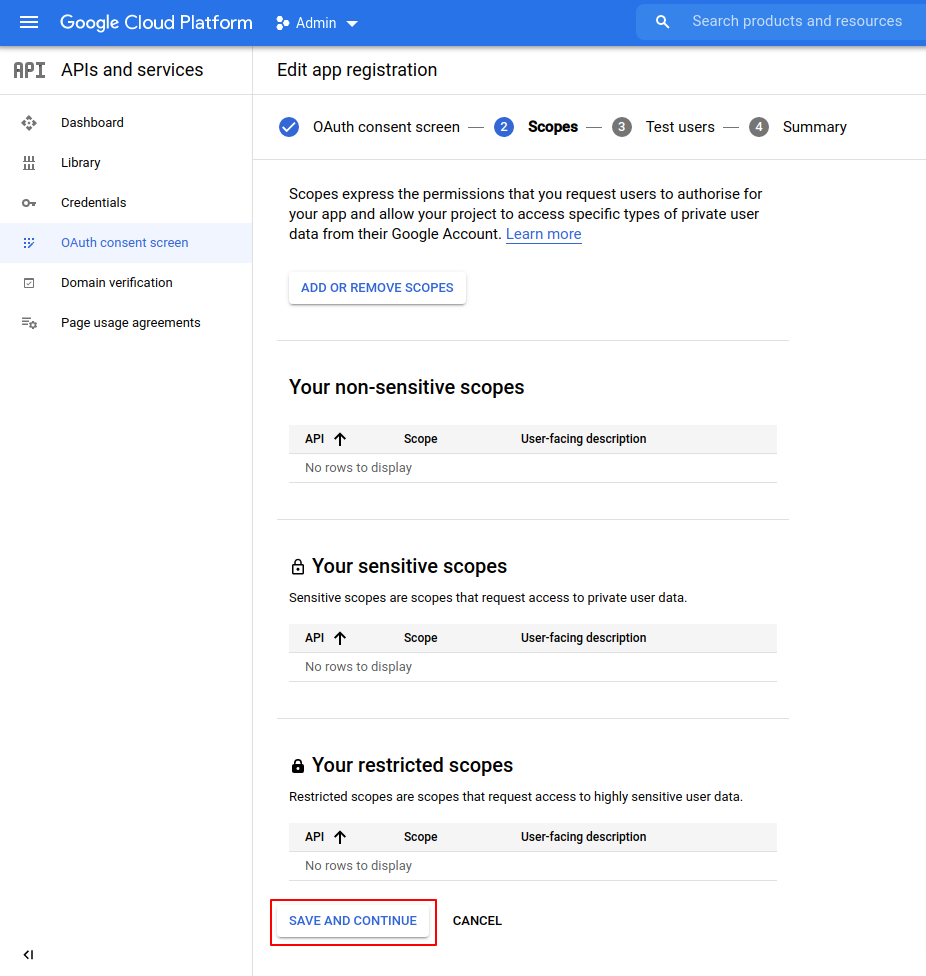
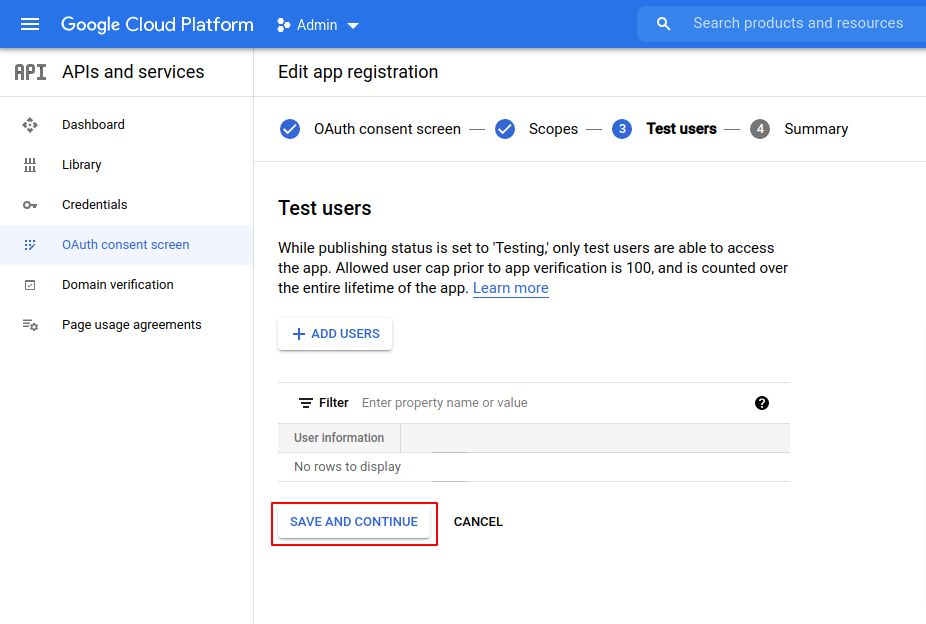
Step 9 :-Click on SAVE AND CONTINUE.
Step 10 :-Click on SAVE AND CONTINUE.
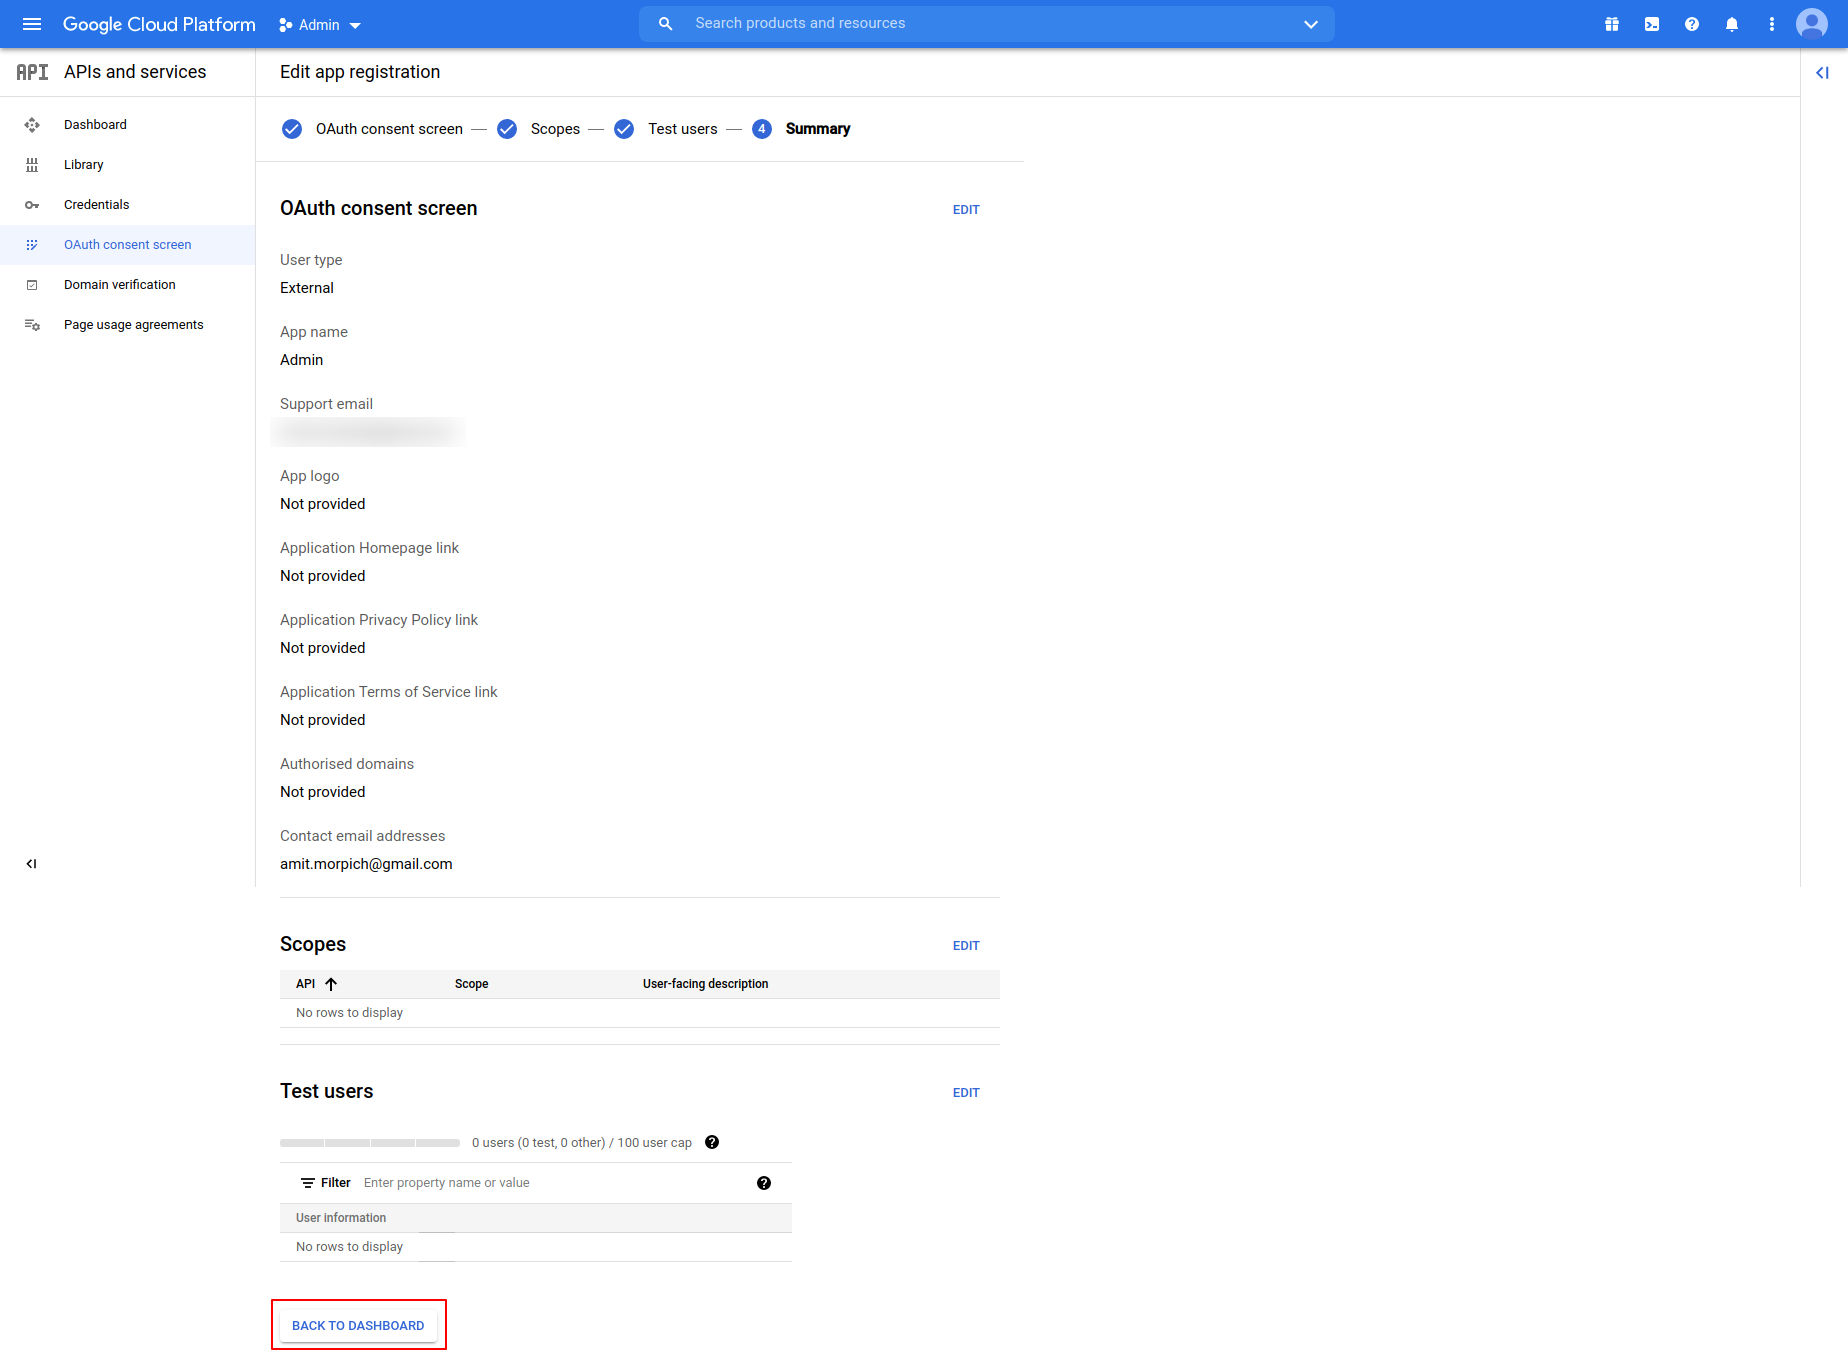
Step 11 :-Click on BACK TO DASHBOARD.
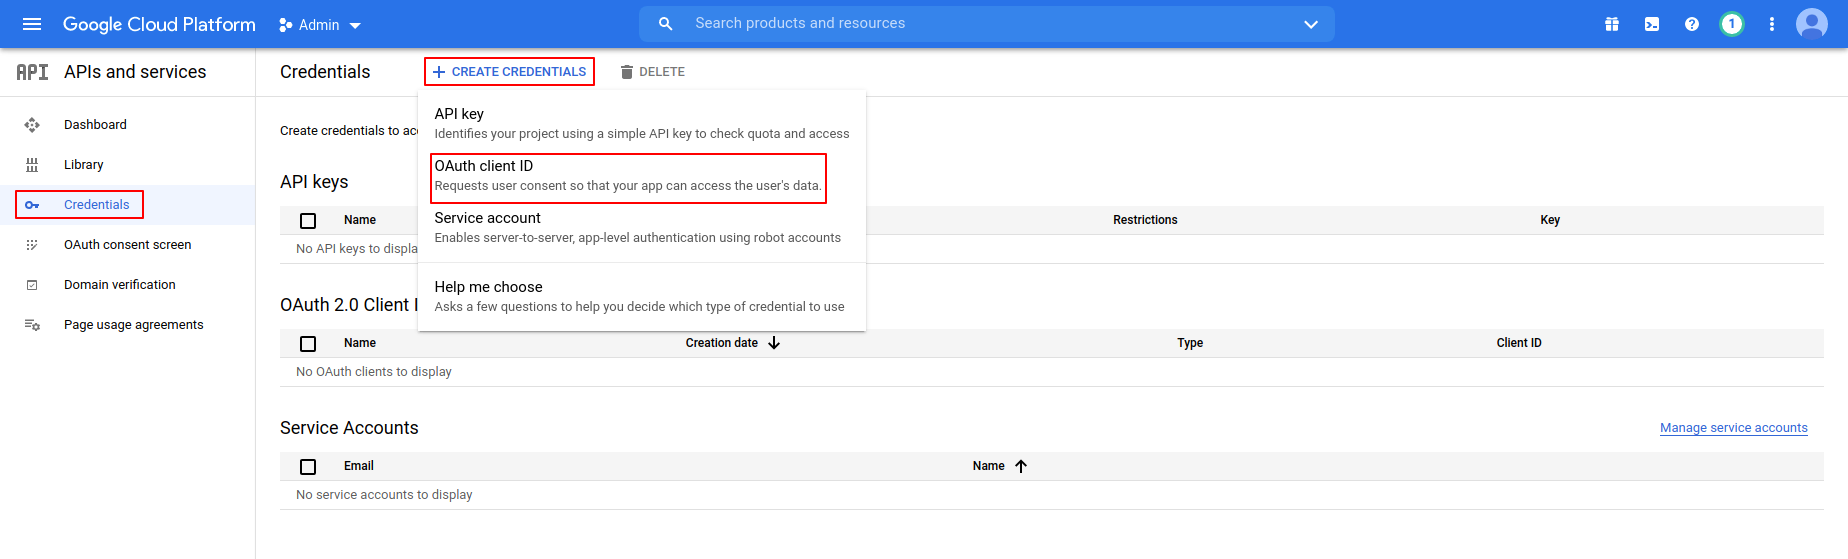
Step 12 :-Click on Credentials then Click on CREATE CREDENTIALS n Select OAuth client ID.
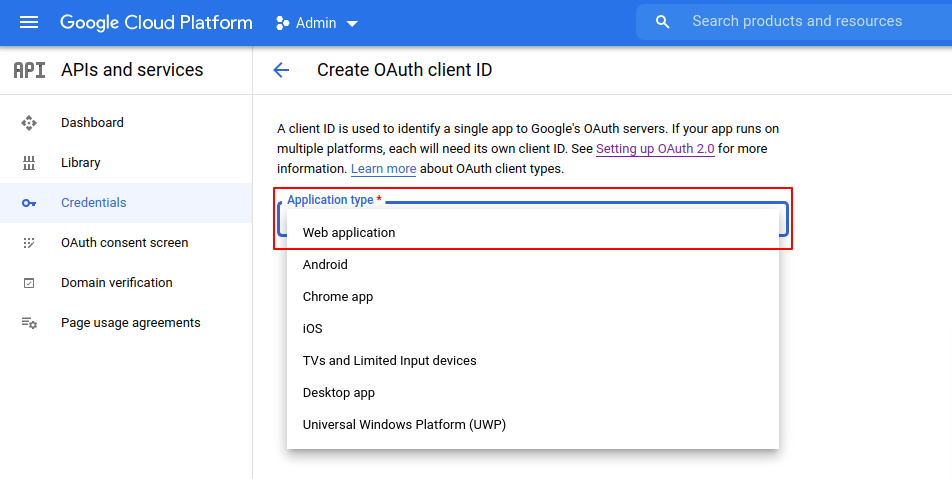
Step 13 :-Select Web Application as Application Type.
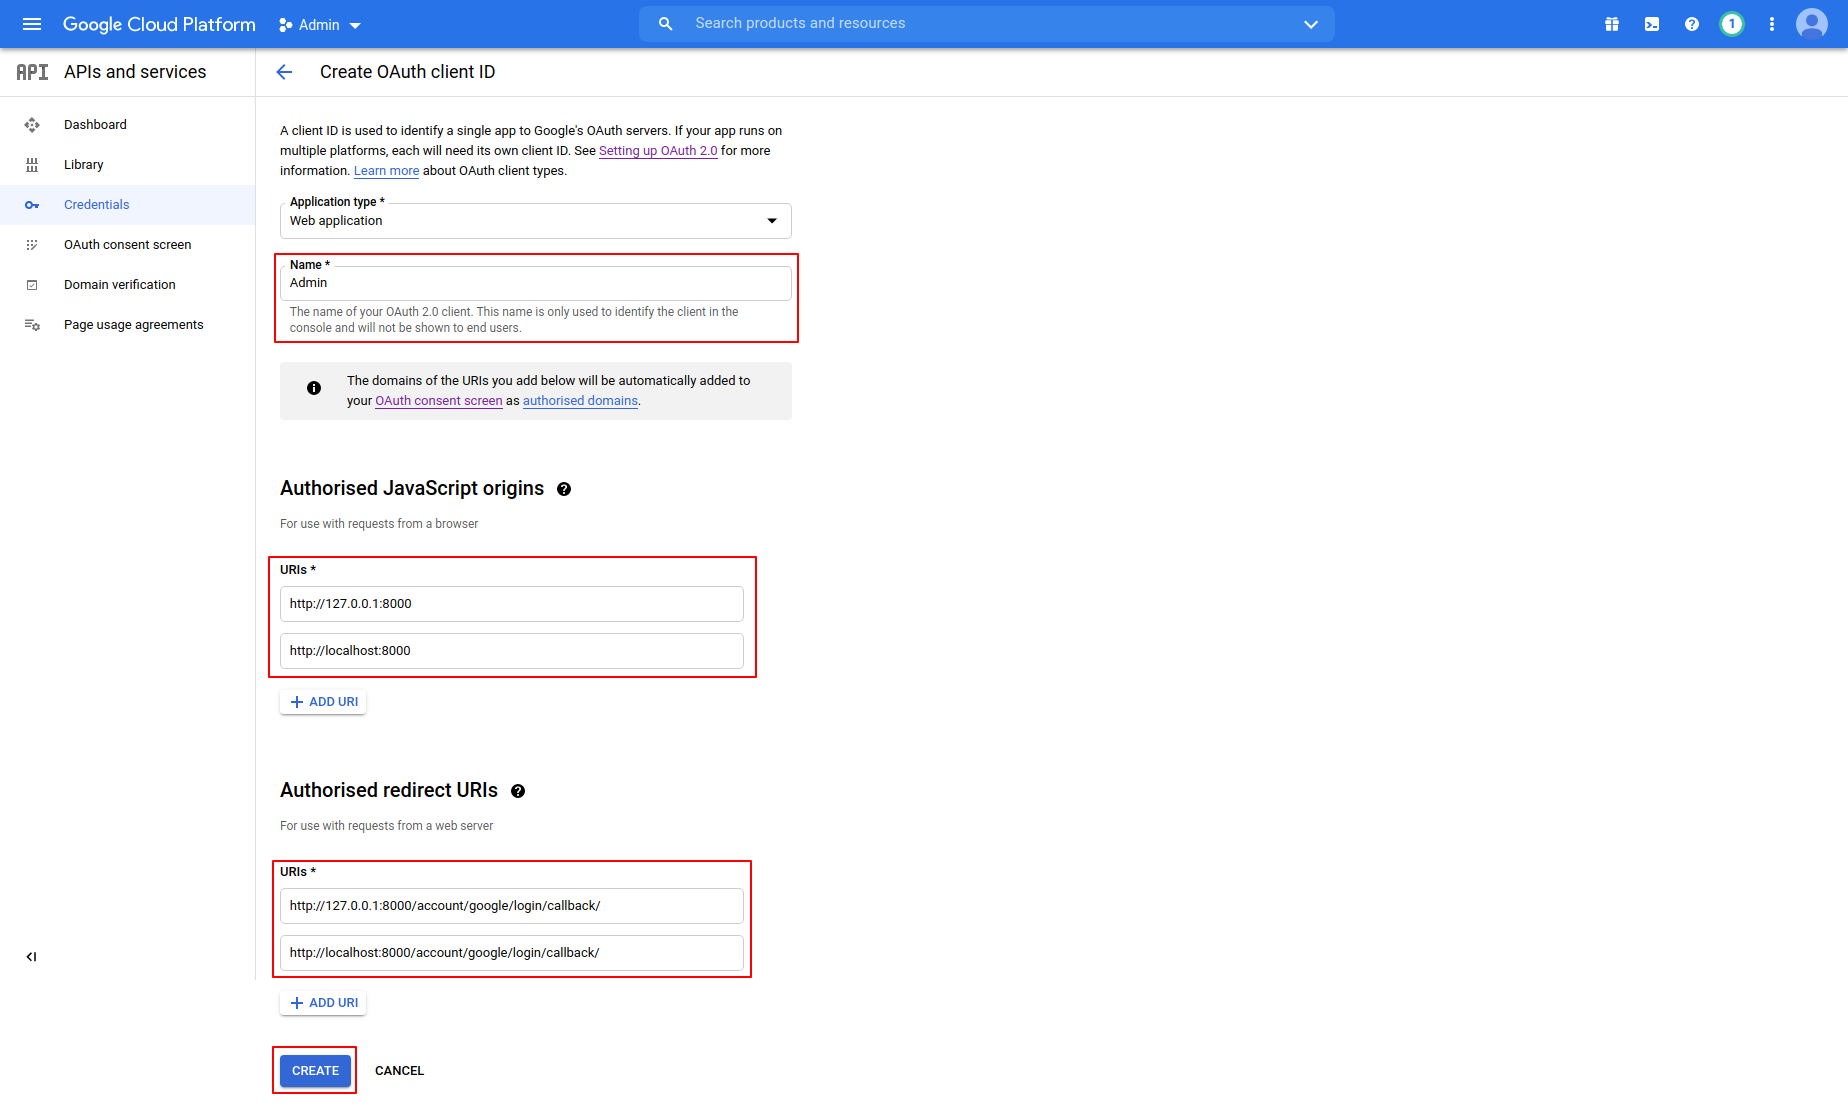
Step 14 :-Add project name in name field and ADD URL one by one
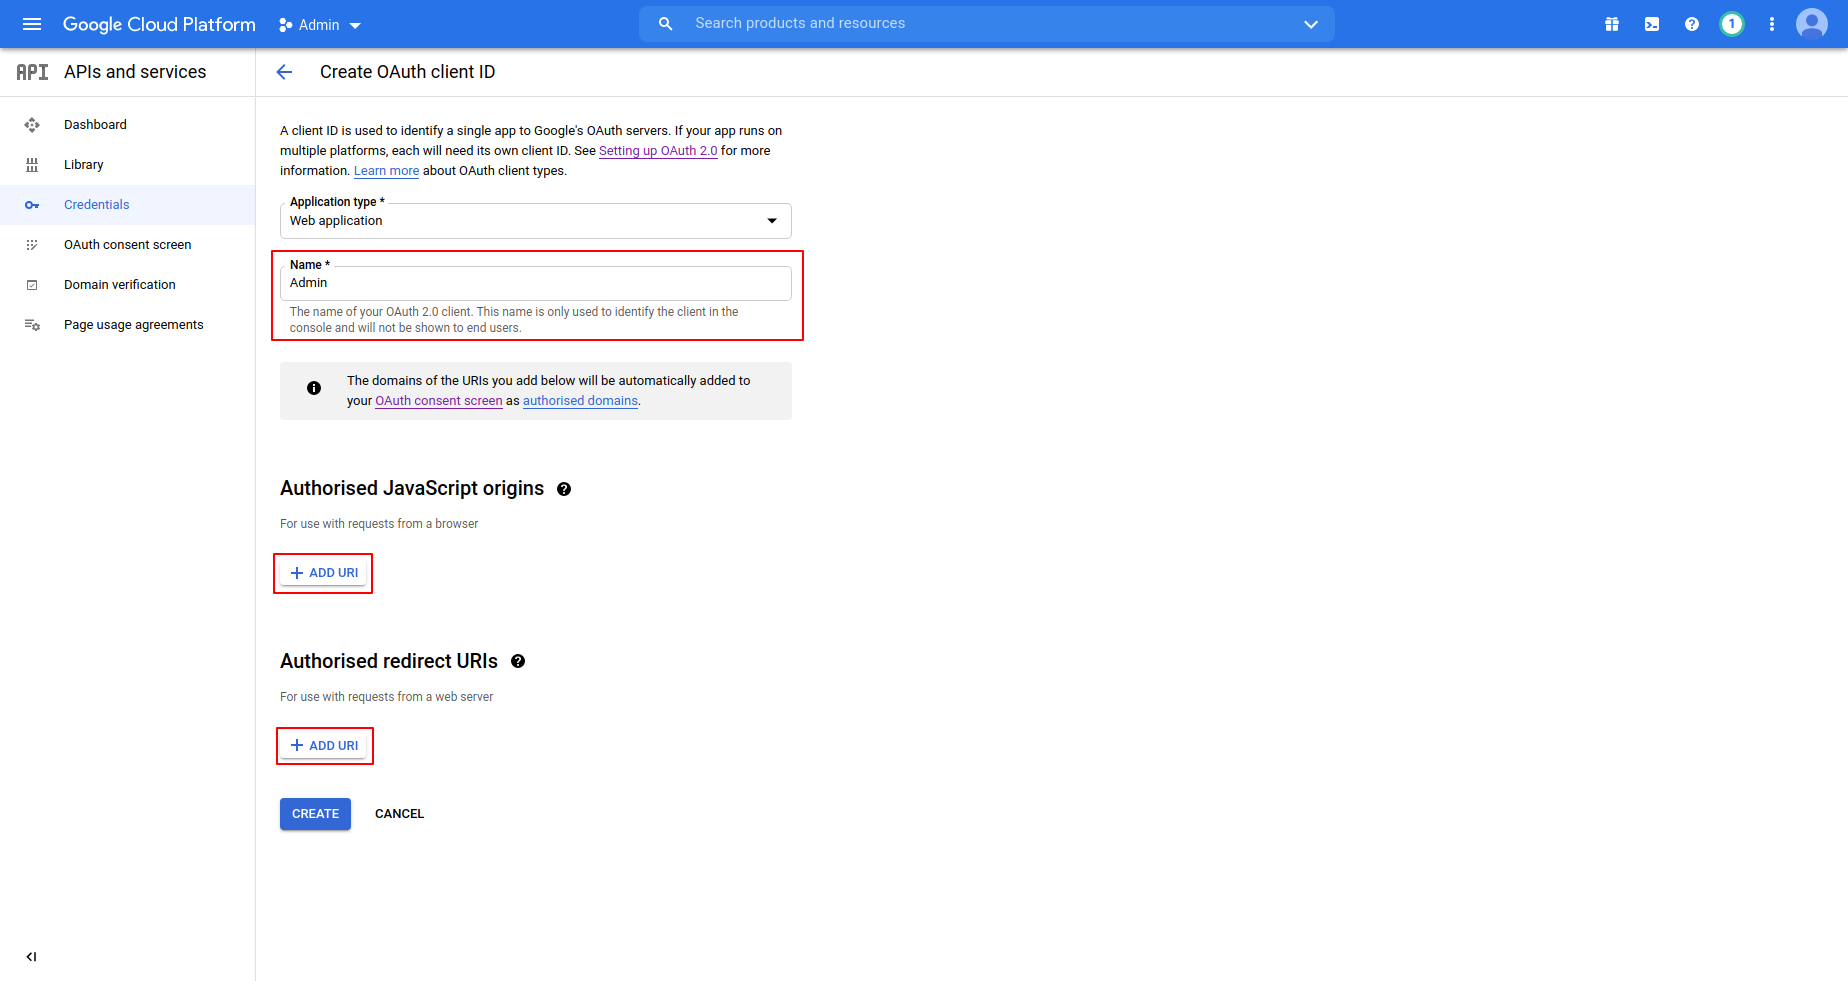
Step 15 :-Add your Site URL in Authorised Javascript Urls and Autherised Redirect URLs.
Step 16 :-Finally,Client ID and Secret Key Generated.

***Social Authentication Configuration***
Follow the below step to setup your Social Authentication Configuration :-
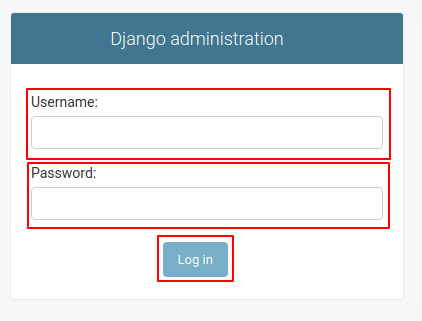
Go to Django Admin Site yoursite/admin
Step 1 :- Enter username and password then click on Log in
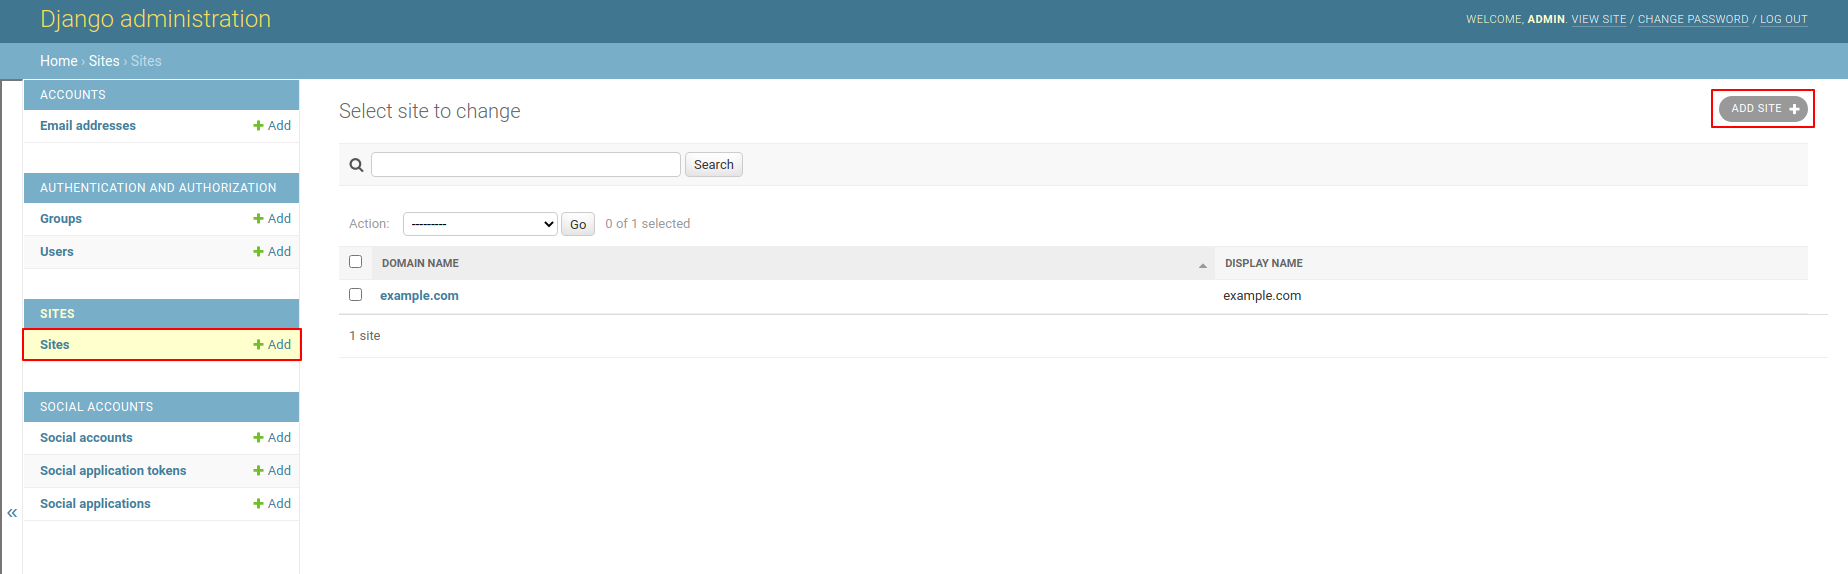
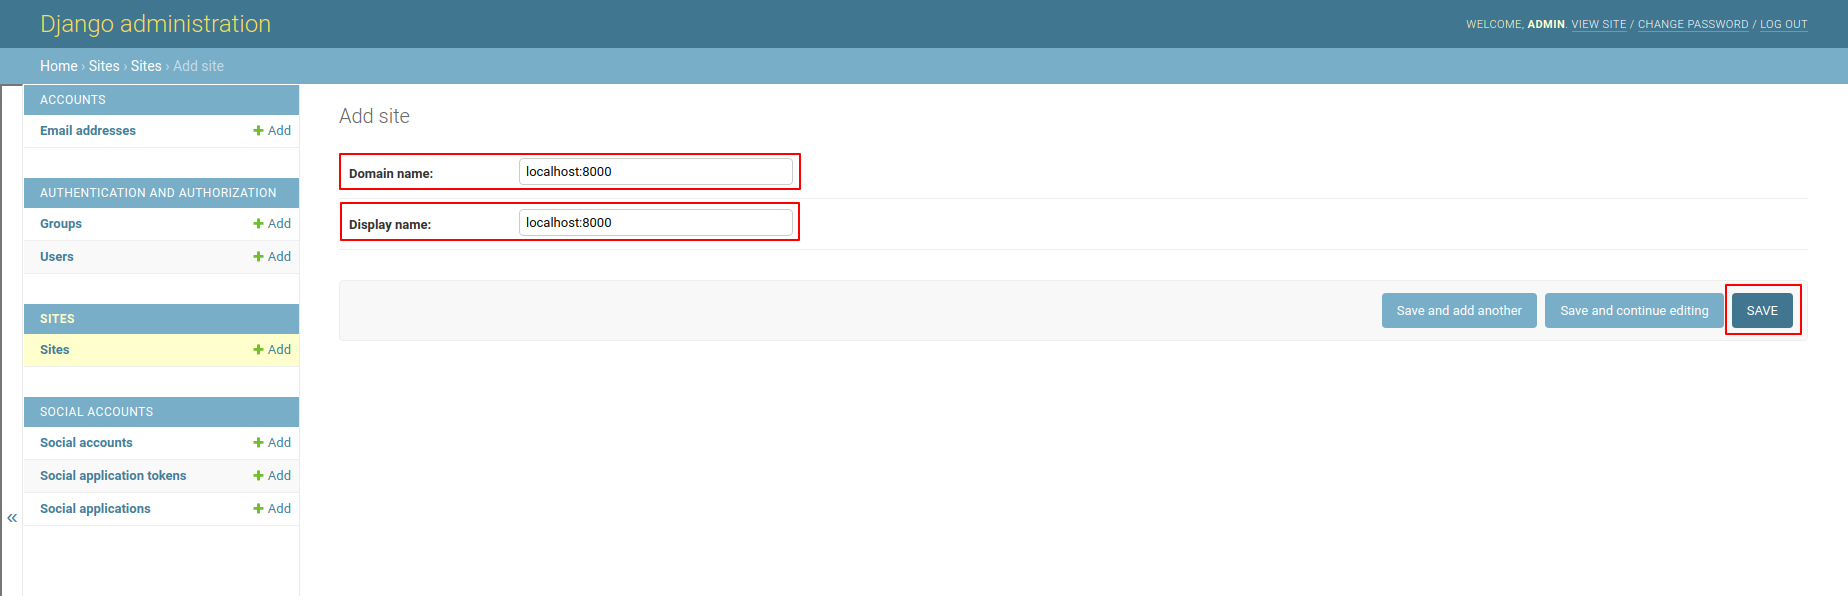
Step 2 :- Go to sites and then click on ADD SITE
Step 3 :- Enter your Domain name and Display name then click on save button
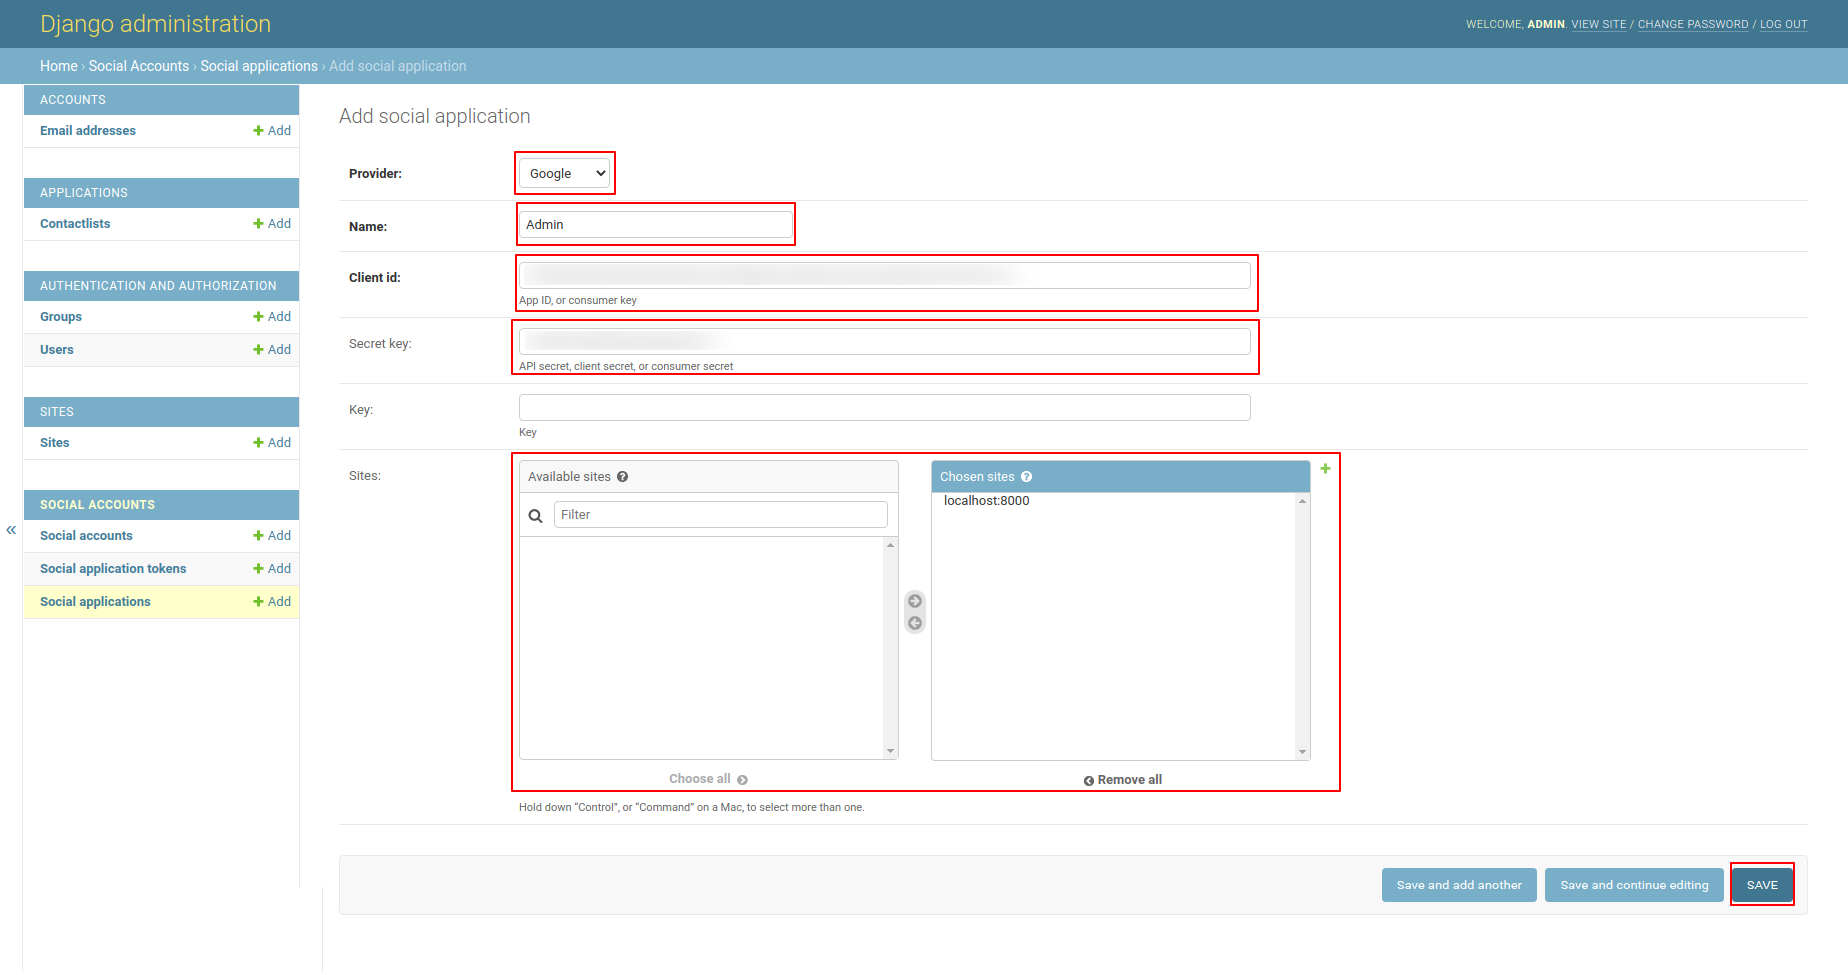
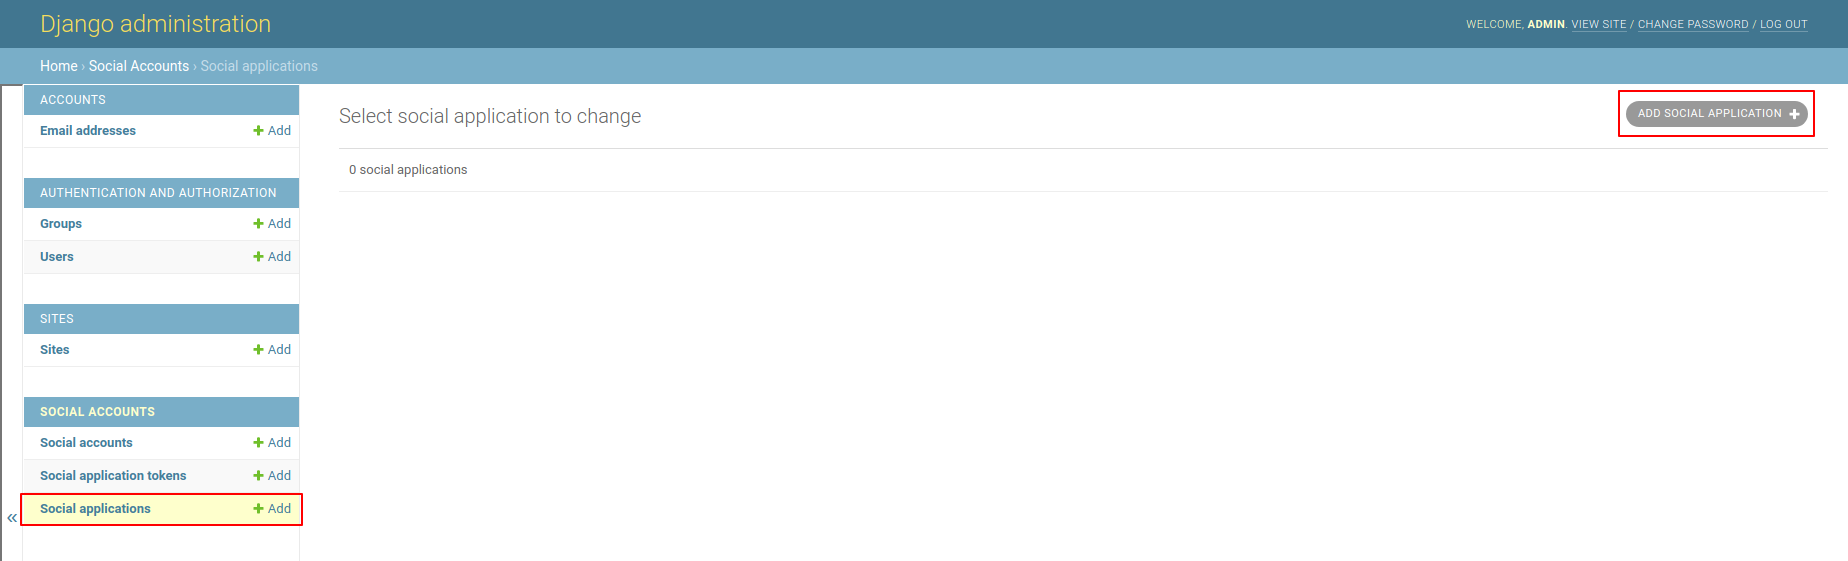
Step 4 :- Go to Social applications and then click on ADD SOCIAL APPLICATIONS
Step 5 Google API:- Add Required details and click on save button